When designing a room, a unit, or an entire building, you can’t define a space without developing a space plan. This crucial piece of the design puzzle provides a framework that helps solve many challenges:
– Circulation and Movement: How will occupants progress through a space?
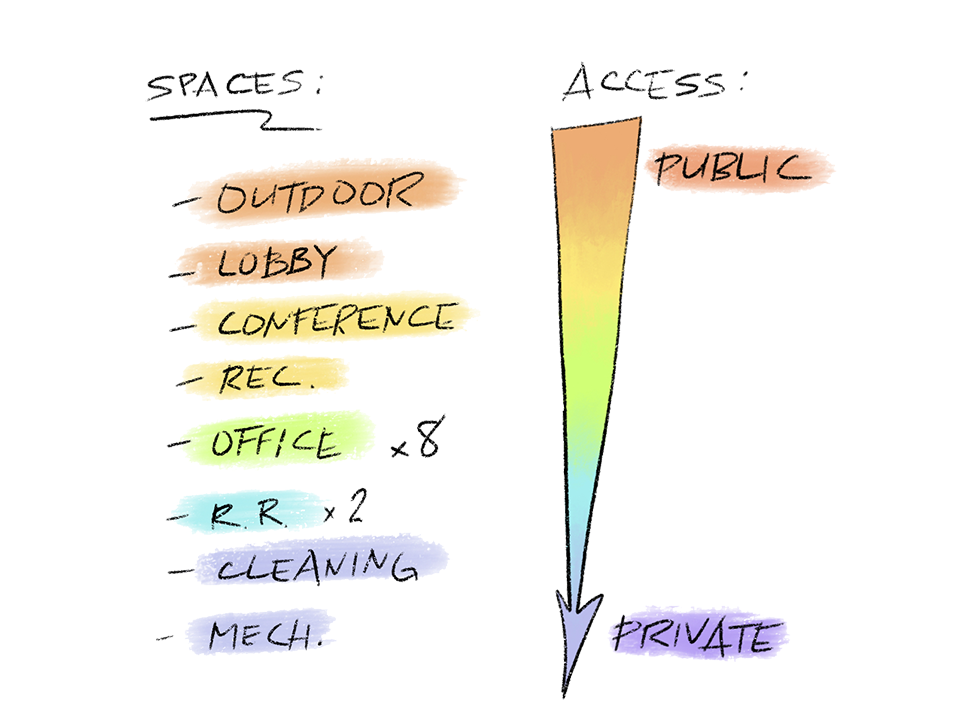
– Defining Zones: What spaces are needed and how large or small should they be?
– Proximity and Adjacency: Can usage patterns be made more efficient?
– Public Vs. Private: Which spaces are open and shared? Which ones are private and closed in?
– Aesthetics: Can beautiful spaces be centralized while unsightly spaces are hidden from view?
– Regulations: Can a space accommodate dimensional requirements of the building code for egress and accessibility?
Step 1: START SIMPLE.
Make a list. Put all your spaces in one place.
Answer the question of ‘WHAT’. Then, loosely organize.
Tip: a SPACE is not the same as a ROOM.
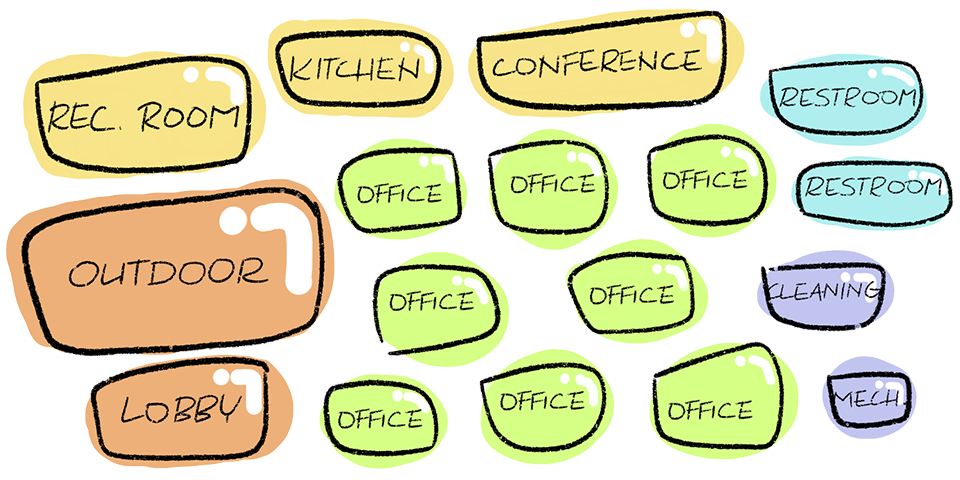
Step 2: LIFE IS MOSTLY FROTH AND BUBBLE. – Adam Lindsay Gordon
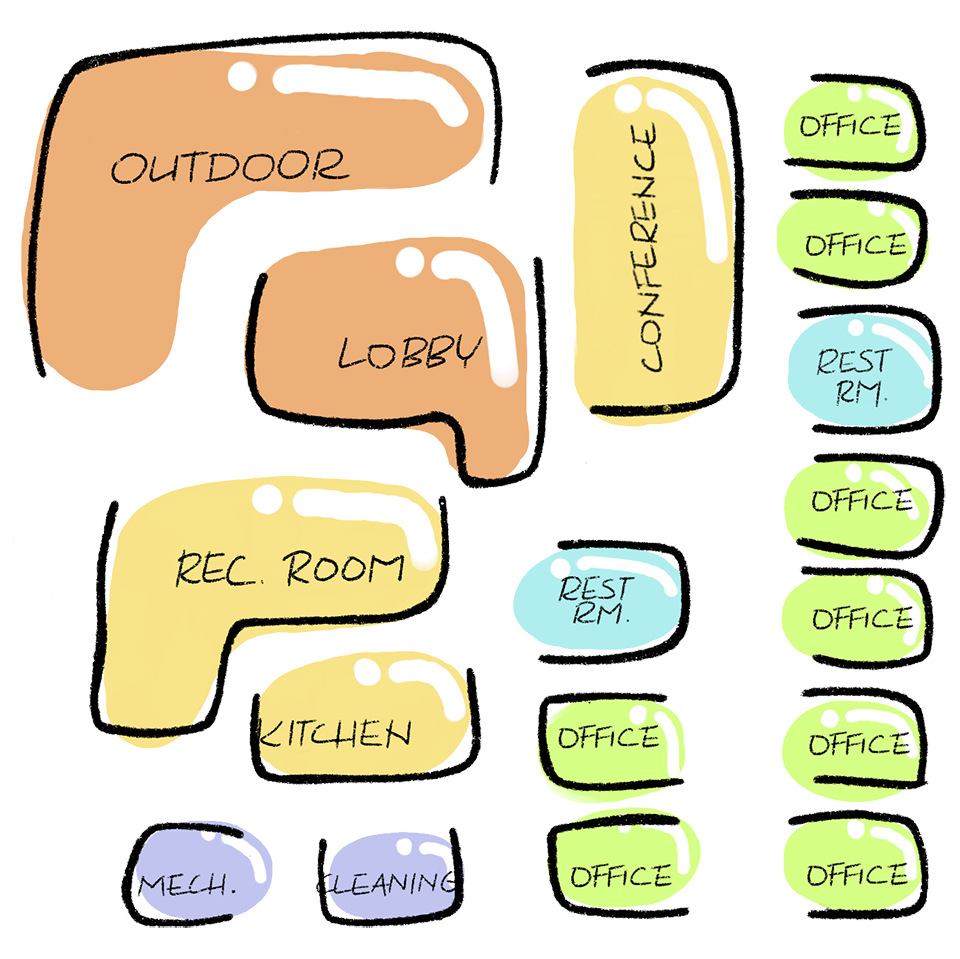
An architectural bubble diagram is a powerful, dynamic tool of visualization, and it starts with just that: a collection of bubbles – one for each space on the list.
The bubbles can be shapeless and float on the page. The key to this step is approximating the RELATIVE SIZE of spaces with relative sizes of bubbles.
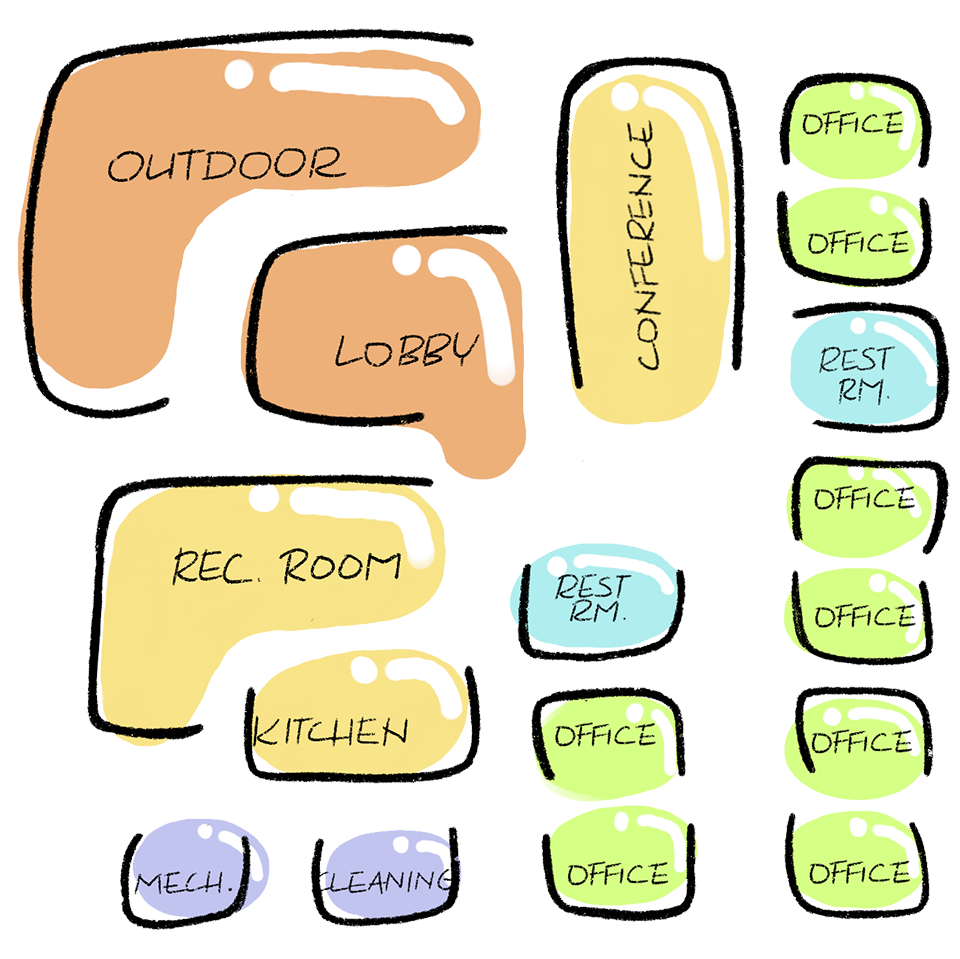
Step 3: ADJACEN-“C”.
The bubbles can now be freely rearranged to test out adjacencies.
The key to arranging spaces is determining how they communicate with each other.
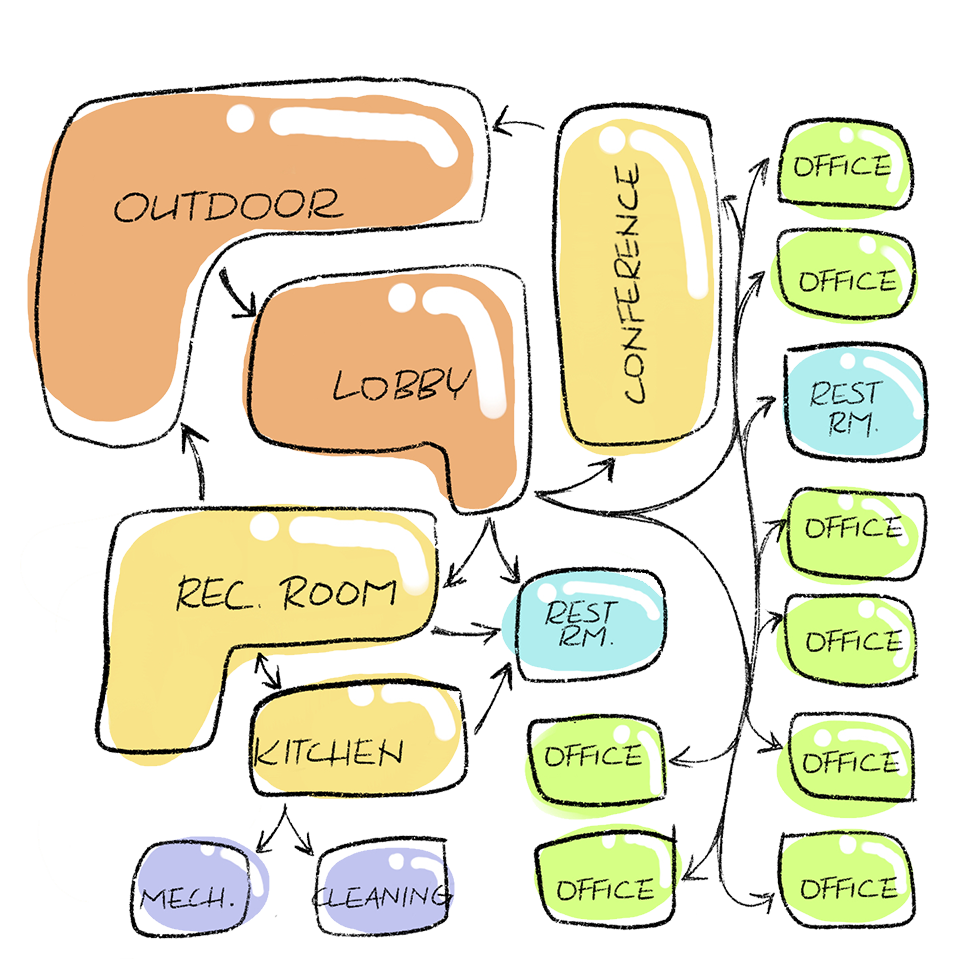
One technique is opening up space bubbles into “C” shapes, allowing them to “breathe” and connect with each other in various ways, depending on the direction that the “C” is facing.
Below, we examine two such possibilities. While the spaces themselves do not move, the relationship between them changes dramatically.
Rigid, grid-like, uncommunicative.
Beginnings of more organic space relationships.
Step 4: SPACE AND RELATIVITY.
Utilizing step 3 to optimize the flow and communication between spaces.
Note that Steps 3 and 4 can be repeated to continually refine ideas as many times as necessary.
Before adjacency study
After adjacency study
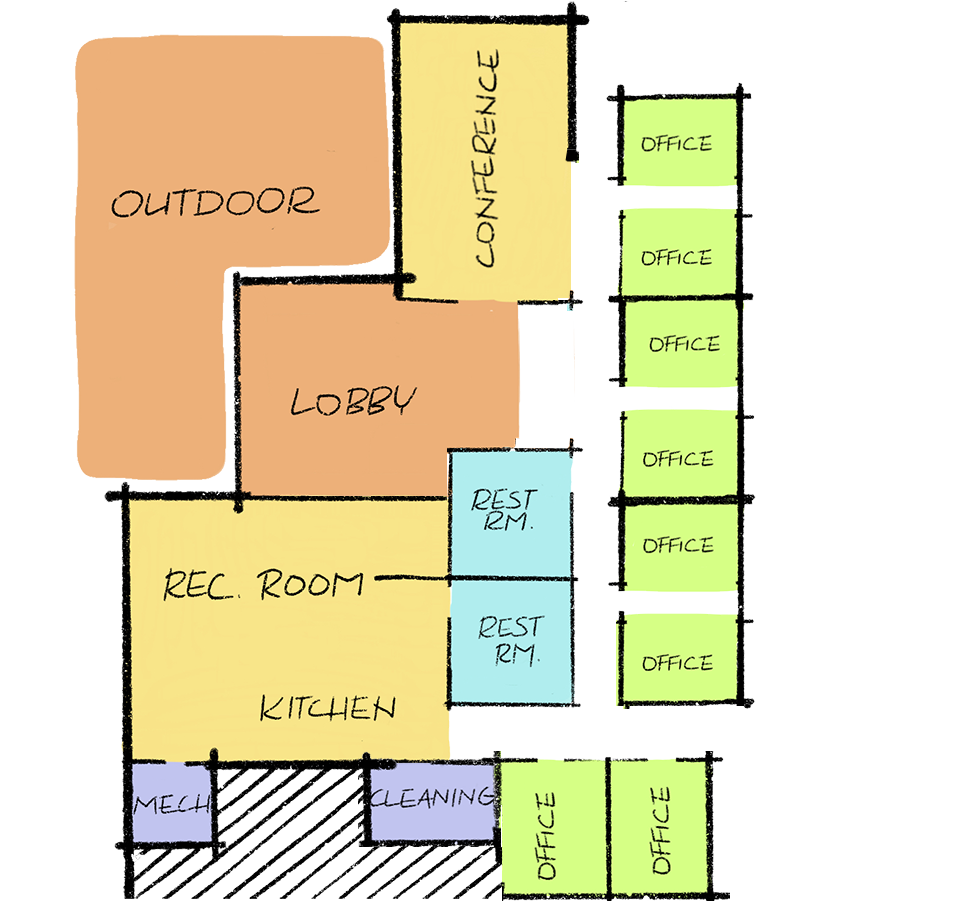
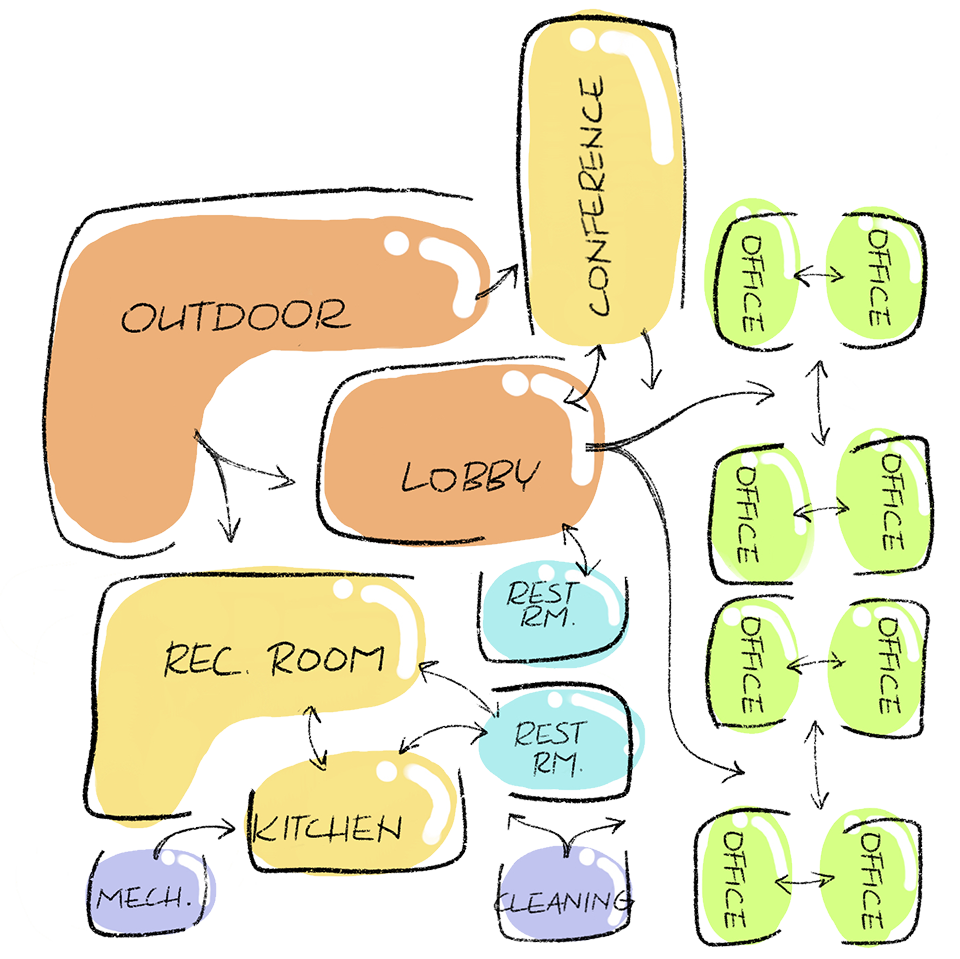
Step 5: WALLS APPEAR.
Time to ditch the bubbles and define some boundaries.
This step can be useful in (A) defining liminal spaces, and
(B) identifying and resolving dead (unusable) spaces.
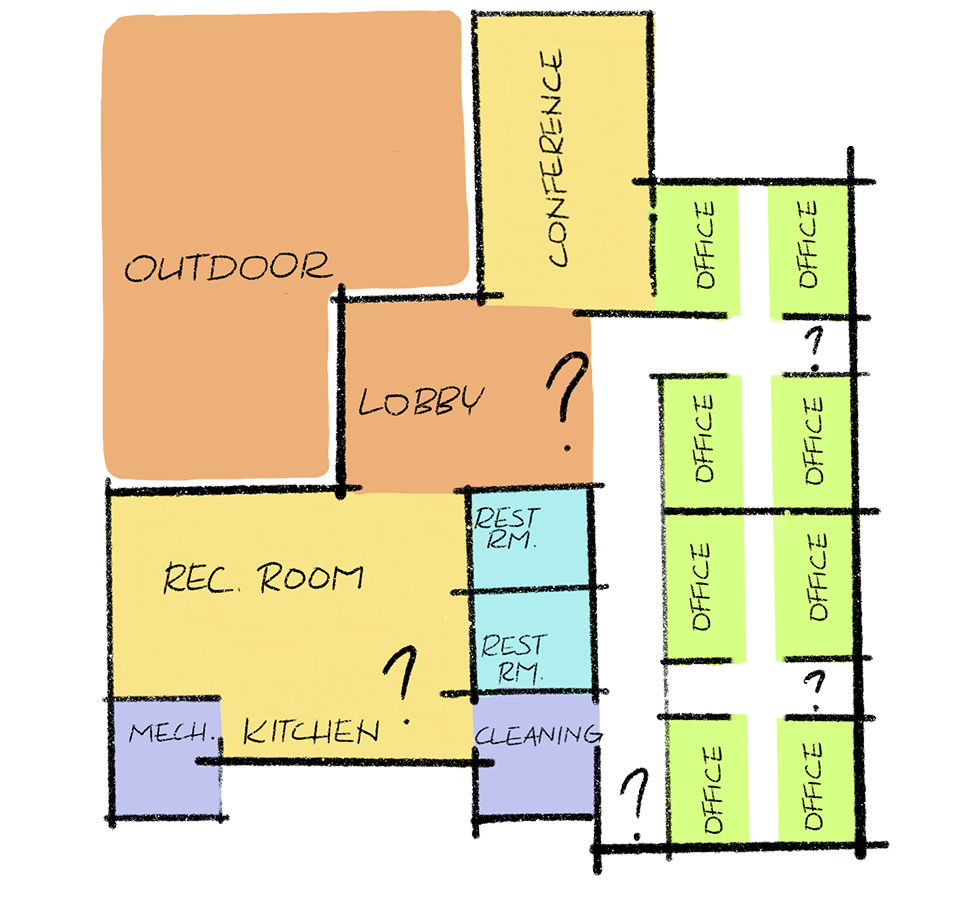
First attempt
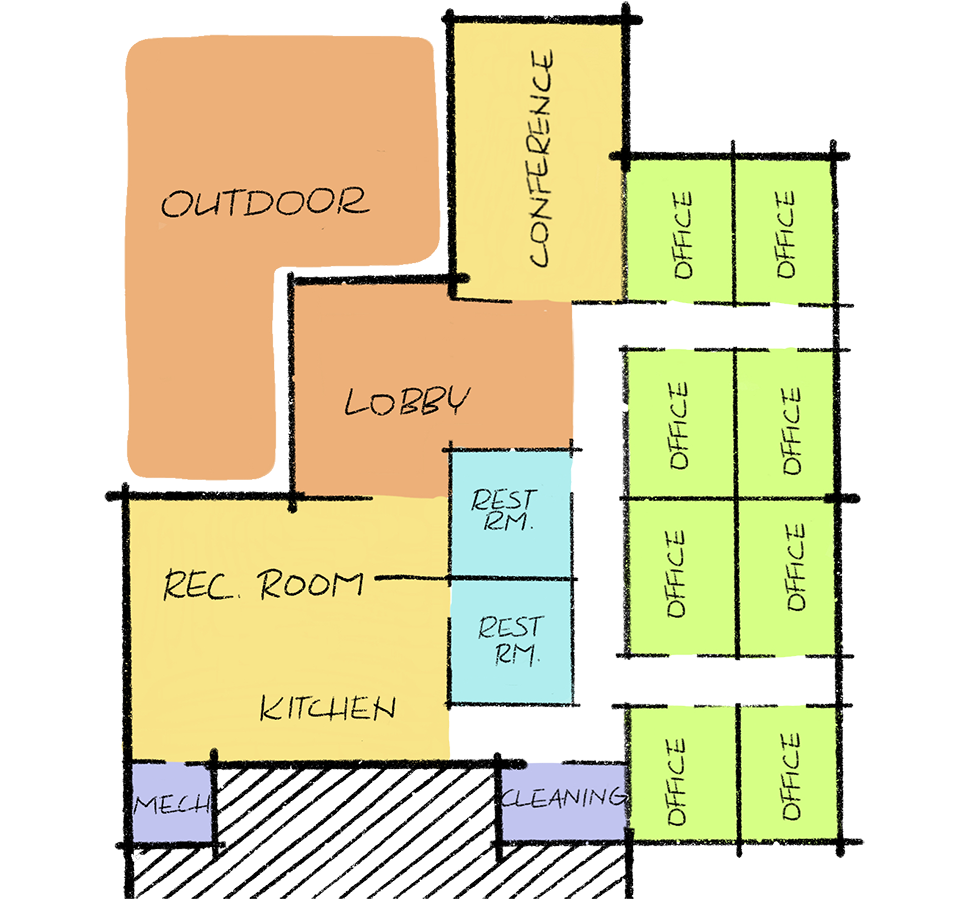
Some refinement
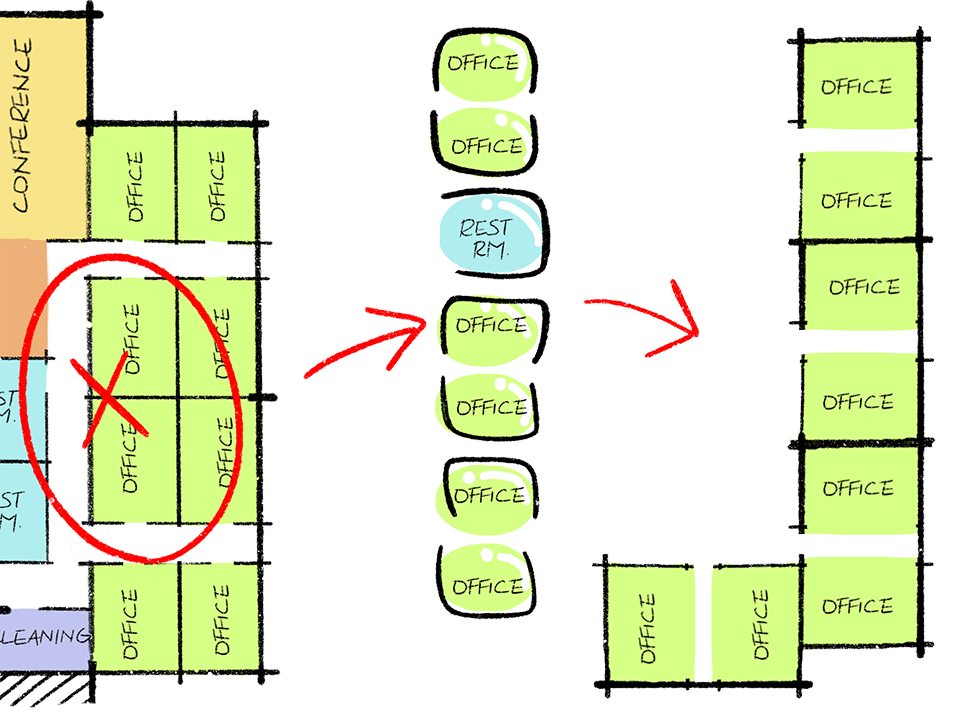
Step 6: STEP BACK & CRITIQUE.
Look over results so far. What works? What doesn’t work? Circle back to previous ideas and compare. Can the “C”-shaped diagrams from Step 3 help resolve the “landlocked” offices from Step 5?
Steps 7 – 99: RINSE AND REPEAT.